In this page
In short
- Add dining areas and tables first, then "Add QR code" for a table, as many as you have tables, in one save.
- Download the codes as SVG files, or design their cards: sticker, table tent, coaster or stand.
- A scan opens your menu at that table as a dine-in order, in every POS plan.
Add the tables first
Under Operations › Dining areas & tables, add the "Dining areas", then the "Tables". The branch needs dine-in switched on under "Order types".
Make a code for every table
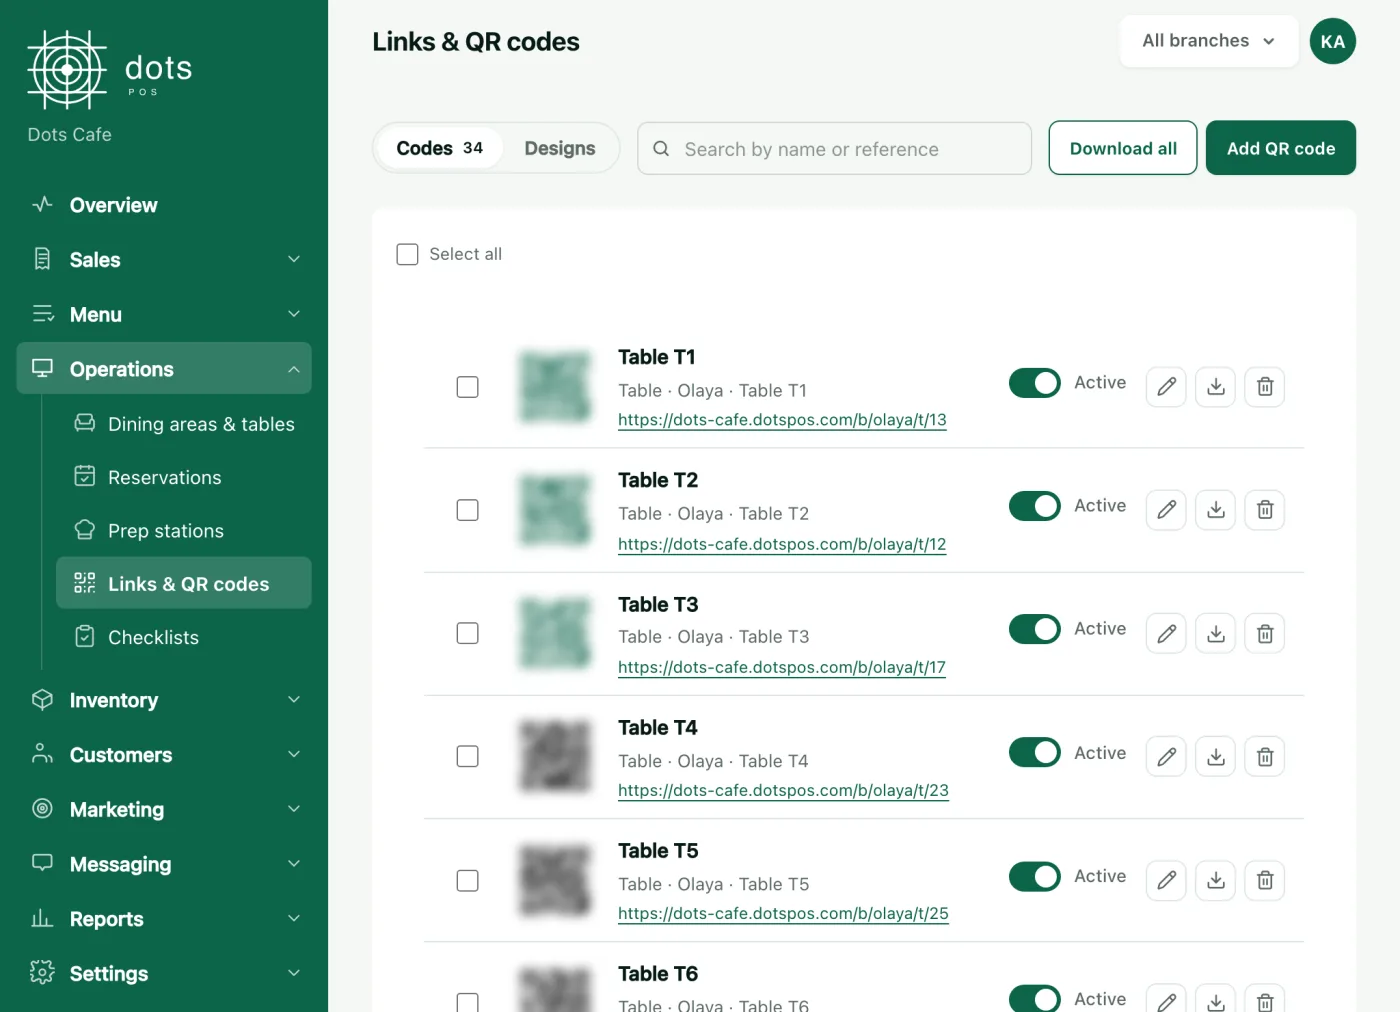
- Under Operations › Links & QR codes, press "Add QR code".
- Set "Used for" to "Table".
- Enter the number of tables in "How many" and leave "Table" on "No table": a code is made for each table without one.
- Press "Save".
A code’s number stays the same if you move or rename the table, so you never reprint it.
Download them, or design their cards
- Plain codes: "Download SVG" for one, or "Download all" for a ZIP with a code for every table.
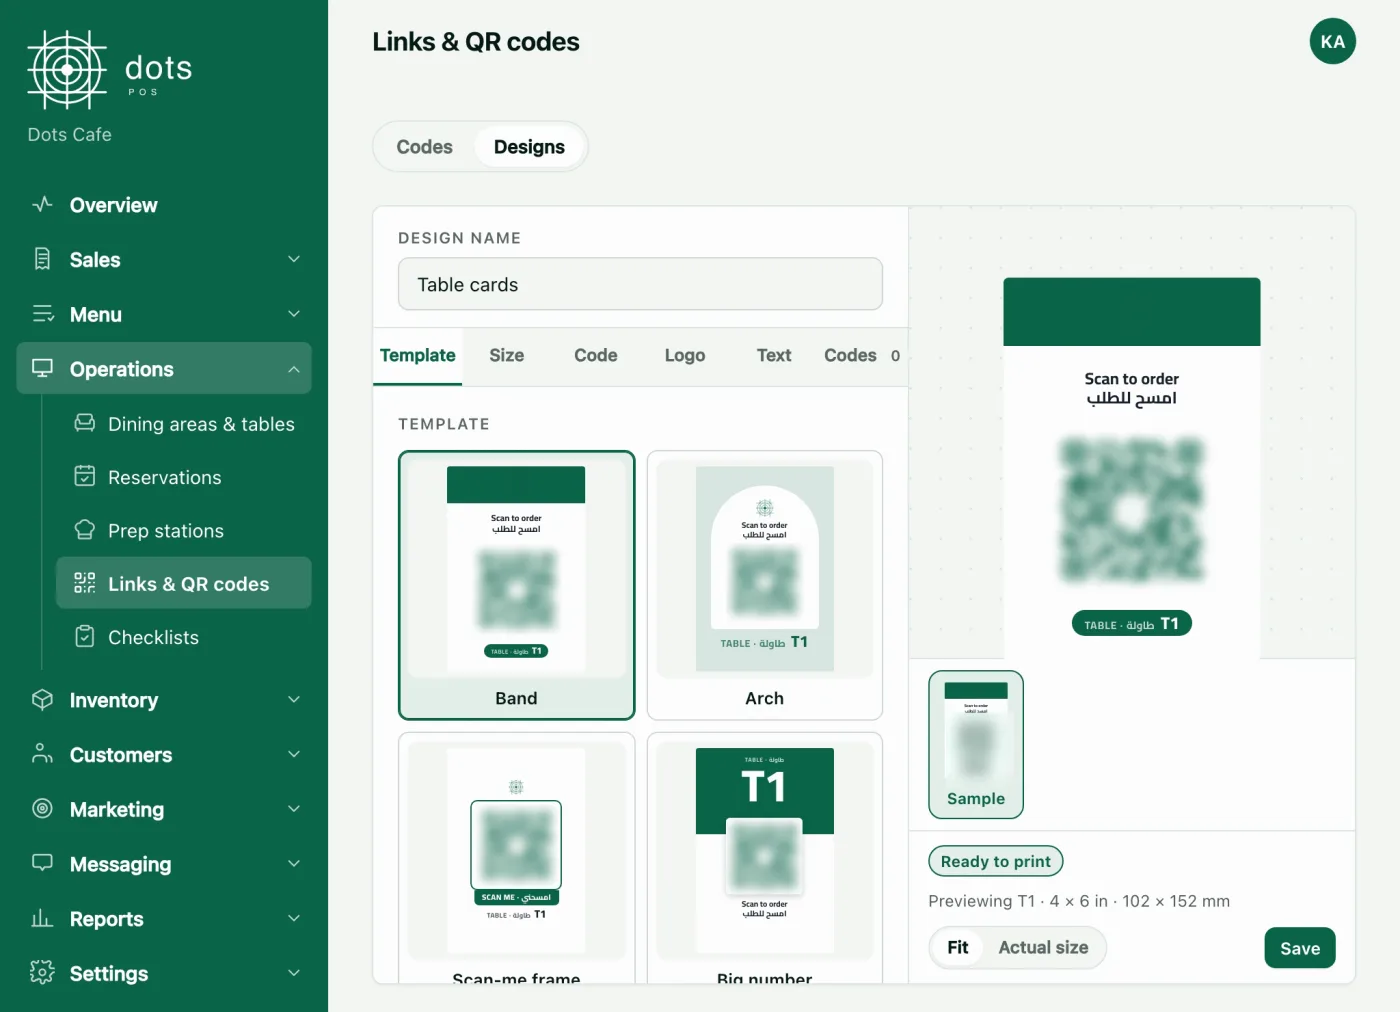
- Designed cards: under "Designs" › "New design", pick the template and the size: table sticker, table tent, round coaster or acrylic stand.
- Once saved, press "Print", then "Print or save as PDF", and print at actual size, 100%.
What your guests see
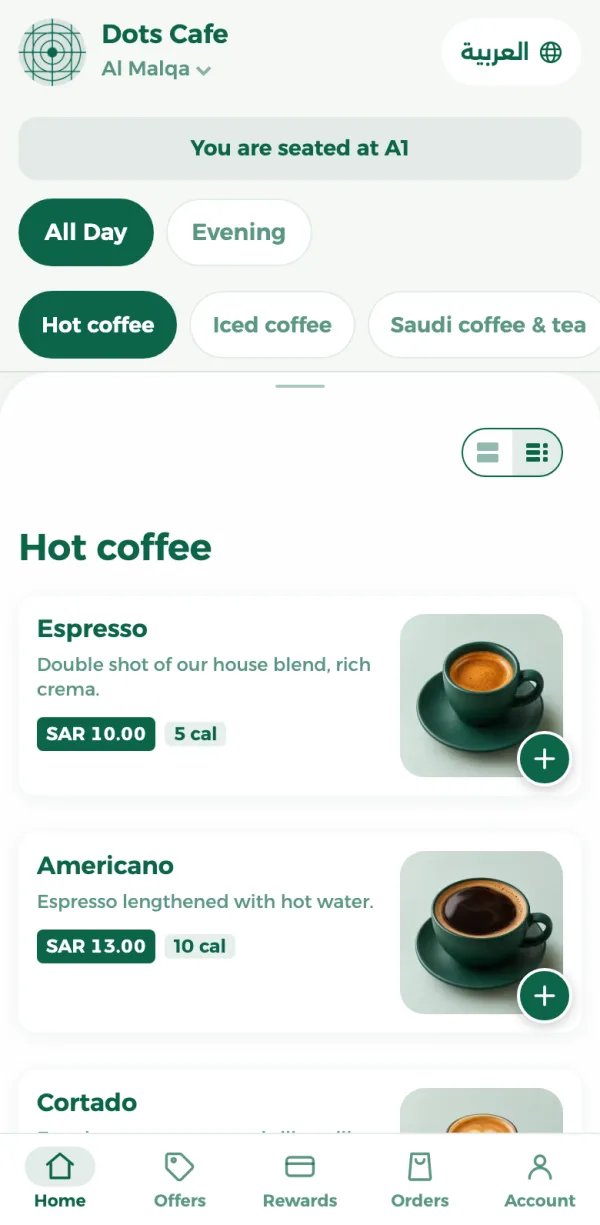
The code opens your menu with "You are seated at" and the table’s name at the top, and the order is dine-in at that table, so guests do not pick pickup or delivery.
Questions
I moved or renamed a table. Do I reprint its code?
No. The code’s number stays the same when you edit the table.
Can a guest choose pickup from a table code?
No. A table code is for dine-in at that table only.
Which plan has table QR codes?
Every POS plan, with the QR menu and online ordering.
Source: The Links & QR codes and Dining areas & tables pages in the dots dashboard.